I love modern planters! But at $700-$1500 piece, who can afford such an expensive home for your plants? I decided to try and build my own a few months ago, and thought about where I can obtain cheap metal boxes. Then I saw an old rusty file cabinet sitting around at the goodwill and thought this would be the perfect shape if I just tilt it horizontally! I did some quick googling and of course, other’s have repurposed file cabinets into planters before.
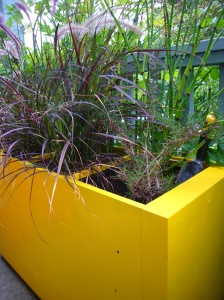
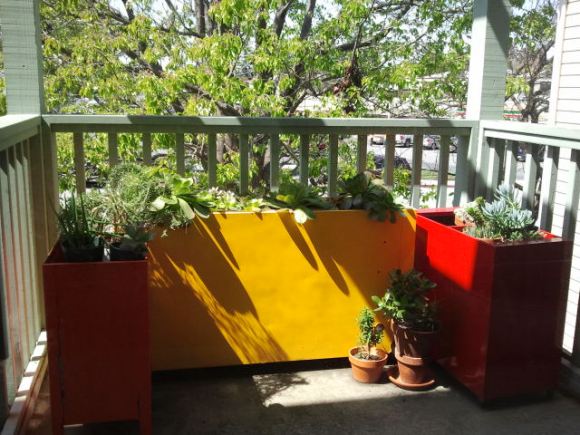
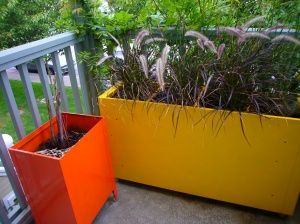
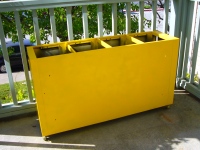
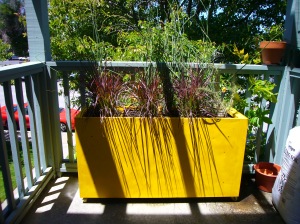
I made some adjustments of my own along the way and now I have two shinny new planters!
Tips for repurposing metal file cabinets into planter boxes:
1. Search Craigslist free section for old file cabinets, before you go pick them up, ask them if the cabinet has a hollow bottom or a solid bottom. Most newer cabinets don’t have a bottom at all! (to save metal maybe) but this is not good for planter boxes. The perfect file cabinet is usually pretty old and has a perfect smooth bottom. There are other file cabinets that have a bottom but its a little raised from the bottom. In that case, you might have to cut a piece of wood and fit it in if you want it to have a perfectly smooth surface.
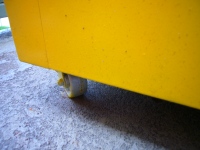
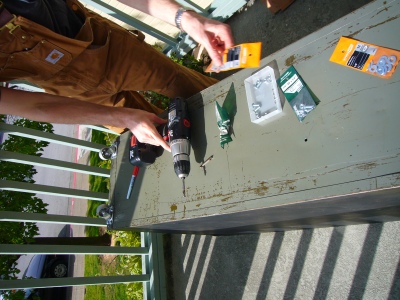
2. Putting wheels on the bottom: I have my planters on a balcony and I’d like the option of moving them around from time to time. I also wanted to raise it up from the floor so the planters have proper drainage (and does not rot my balcony from collected water). I bought 4 metal wheels from Home Depot (3.99 each) and a pack of nuts and screws. I drilled holes to align the metal wheels and bolted the wheels in from the inside.
3. Proper drainage: I drilled 10-20 holes in the bottom of the cabinet to provide proper drainage for the plants
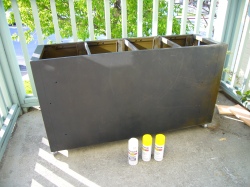
4. Painting the cabinet: Since the planter will be outdoors, its important to paint the cabinet with rust proof paint. I decided to use Rustoleum spray paint. First, sand off any rust from the cabinet, clean the cabinet, prime the cabinet with Rustoleum primer for metal. I used 1 bottle of primer which did not cover the whole cabinet in white but I just wanted to give it a light priming job. I used 2 bottols of yellow Rustoleum for metal spray paint to finish off the job. NOTE ABOUT RUSTOLEUM SPRAY PAINT: read the directions fully! it says that you can pain the 2nd coat on within 1 hr OR 48 hrs of 1st coat! Do not paint a second coat on between that time or the paint will bubble and peel off (as I found out the hard way!). I have had my plants for a few months now, the paint looks great. We’ll see how it hold up through the rainy season!
5. Filling the file cabinet: If you have a 4 or 5 drawer cabinet, that’s a lot of dirt you have to buy or obtain for your planter. One way to get around that is you can put large rocks at the bottom to take up some volume. (but it makes the planter pretty heavy). Another idea I read about is you can put styrofoam packing peanuts at the bottom. They provide drainage and are safe to use at the bottom of planters. HOWEVER, if you are going the packing peanut rought, make sure you fill the planter at least half way up with peanuts. Once you put the dirt on top of the peanuts, the peanuts will be crushed by the weight of the dirt and only provide you with maybe 1/5 of the volume you originally filled it with.
6. If you don’t want to fill the whole cabinet up with dirt, you can also put some buckets (for height) in the cabinet and simply place some potted plants in the cabinet. You might want to make a “cover veil” for the top and put some nice white rocks or sand so it doesn’t look like you just have pots inside the cabinet.
I’m working on building a smaller and medium version of the cabinet. I’m going to paint it bright Orange!
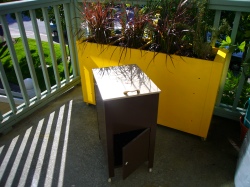
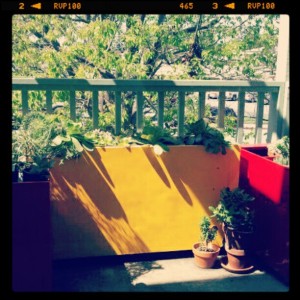
Update: 4/7/12 After having had these for over 2 years, I have added another red 2 drawer planter to my collection:
After filling it up with packing peanuts and dirt (a lot of dirt) I regret doing that. The dirt has mostly sunk and now fills up only half the planter. I should have just used square planter boxes and elevated them using buckets. Now I use plastic spinach containers you find at Safeway or Whole foods (those prewashed plastic boxes of salads). Punch holes at the bottom and two of them fit snugly into each file slot. I elevate them using a small bucket on top of the sunk dirt.
Hi there! I’d love to use some of these images in my blog post for HOUZZ. I would credit you and link to your blog. you can email me at beth@bneato.com. Thanks! Beth
here’s the post–thanks again!
Hi Betty,
I found this article and you blog via Beth’s Houzz ideabook. This is not the first time I have read about file cabinets being repurposed as planters, but yours certainly are the prettiest I have seen! Thanks for the handy tips as well!
I found your article via houzz also and your idea is really clever. I wanted to add that there are other options for fill (other than packing peanuts) – shredded paper, wood chips, or surplus used coffee grounds from a local cafe. I would also be more comfortable eating produce from plants in a container with a wood filler rather than styrofoam. Nice job on these planters, and kudos on upcycling one of these old file cabinets! I’d love to see some pics of what this looks like from the curb as well – the bright colors sure would pop and make your home more appealing I think.
Thanks Eva!
I only plant decorative plants in my planter, probably wouldn’t want Styrofoam if I were planting edibles… ha ha…! But now that I have had these for over 1.5 years. I have decided that perhaps the best thing to do is to use medium depth planter boxes (maybe 1 foot deep planter boxes) in them and elevate them using old buckets instead of trying to fill them up with dirt. After I filled it with packing peanuts, I still had to buy a TON of dirt to put in it (like 5 giant bags). Looking back, I should have just saved myself the trouble and gone with square planter boxes instead. (I couldn’t find square pots that fit, but I do find that those large spinach containers work really well. Punch hoes in the bottom of the spinach containers, and 2 of them fit snugly into one file cabinet slot). I’ll post some more pictures later. Thanks!
What do you do to the bottom, which on most 4-drawer cabinets is open???
Hi Mike,
Most modern cabinets do not have a bottom at all, so you need to rig a piece of wood that size and fill it in. I did not do this because I specifically looked for old cabinets that had solid bottoms. If you go to goodwill or look on craigslist, make sure you lift the bottom and see if there is a bottom. It may take a little longer for you to find a cabinet but I think this is easier than trying to rig something up.
I’m planning on doing these as raised bed planters for gardening, and will be solving the “open bottom” problem by simply butting two cabinets together (open bottoms together). Great idea! Thanks so much.
Great idea about sticking two together! We’ll have to tell Mike!
Mike, Daniel suggested that you stick two open bottom cabinets together, that way you won’t have to deal with filling it in with wood! (it’ll be extra long… but maybe you can put two 2-drawer cabinet together.
I’m in the process of making mine. I bought a 36″x36″ sheet metal at Home Depot and cut it into 15″x25″ to cover the bottom. At the suggestion of an HD employee, I also purchased some heavier guage aluminium to create some braces to suppor the lighter weight sheet metal against the weight of the soil.
I would say, don’t bother filling the entire thing with soil. The best is to put some plastic buckets under to give it some
Height and just use some salad container or pots inside the box. It was a real pain to put all the soil inside and made it super heavy. I had to move them and had to dump all the dirt out, lol. The second time around I just filled the bottom with some styrofoam or buckets and put some pots or salad containers with plants in it looks exactly the same and you can switch out the plants if you get tired of it. 🙂
Hi- another trick for filling big planters is to use empty water or soda bottles. Mixed in with the packing peanuts. And, styrofoam chunks work great.
Hi, I love this idea–especially the colors you’ve chosen. I’m writing an article for our local paper and would LOVE to include a picture of your file cabinet project for the repurposed section of the piece. If you are willing to share an image or two, the paper is happy to credit you and/or your blog. Please contact me at page@vidaflora.net asap–deadline looming! Great stuff you have here.
Hi Page,
Sure, I’d be glad to part of your article! Thanks!
🙂 Betty
Super! Can you email me a copy of the image above the text ” My finished planters!” or any others that show the 2 colors. Also, please let me know how you’d like the credit to read. Thanks so much!
Hi Page, if you click on the picture, it will open up to a page with the full sized image there already, all you have to do is right click copy and paste the full sized image. (all the images if you click on them have the full sized version). You can credit my url: https://boopyprojects.wordpress.com/
Thanks! Betty
I love this! What a brilliant idea!
On HGTV’s Yard Crashers, they filled a tall planter with a large bag of empty soda/water bottles. Because the bottles were in a tied up bag, there was no worry about the soil falling through/between the spaces. I thought that was a great idea for a filler…lightweight and more re-purposing. I guess for a shorter container individual bottles could be used to take up space without adding weight.
[…] family at Boopy Projects has added some wheels and a coat of color, and their front porch show stoppers have been going […]
[…] Boopy Projects, here’s a DIY file cabinet project idea for the great outdoors! Where once there were bills […]
[…] new glass bell jars and vases, they display well in windows. The planter boxes are featured in my File Cabinet Planters blog entry. The kitchen features granite counter tops and wood cabinetry (I did the remodel […]
[…] Full tutorial on boopyprojects.wordpress.com […]
Try recycling empty 4-12 oz water bottles. Lid on, crushed. They don’t decompose for a long time and really make great filler and allow for drainage. Great solution for this project. I will be building them myself.
[…] How To Turn A Filing Cabinet Into A Garden Container […]
Curious, has the paint still held up? Are these exposed to the elements at all and have you had to retouch them?
HGTV also suggested old plastic water bottles for fill of large planters so they aren’t heavy and use less soil.
[…] File Cabinet Planters | Boopy Projects – Jul 01, 2010 · My repurposed File Cabinet Planter! Update: 4/7/12 After having had these for over 2 years, I have added another red 2 drawer planter to my collection:… […]
Hi I’m thinking of doing this with just the drawers out of the filing cabinet but have been worried about them rusting? How are yours going? Any rust/holes?
I had it for about 5 years and it was okay. I would say go really thick with the primer to prevent the rusting. After 5 years we sold the house so I don’t know how it is doing now.
Another question:
What do you do with the drawers from the file cabinets??? I’m searching endlessly and coming up empty handed.
I don’t remember what I did with them. I think i threw them away when I remodeled the kitchen. I have seen some people put dirt in it and make them into planter boxes. If the drawers are real boxes and not just the front part. Good luck!