It’s been almost 5 years since I purchased my first apartment. Finally, having a place of my own allowed me flex my creative muscles and do whatever I wanted to my first home. Here are some shots from my interiors and perhaps they can be of inspiration to you as well! Most of my furniture items were sources second hand on craigslist or through Antiques By the Bay (*Whenever I mention flea market in my blog, I’m most likely talking about Antiques By the Bay), or they were simply found objects that I had collected over the years.
Entry

Entry details
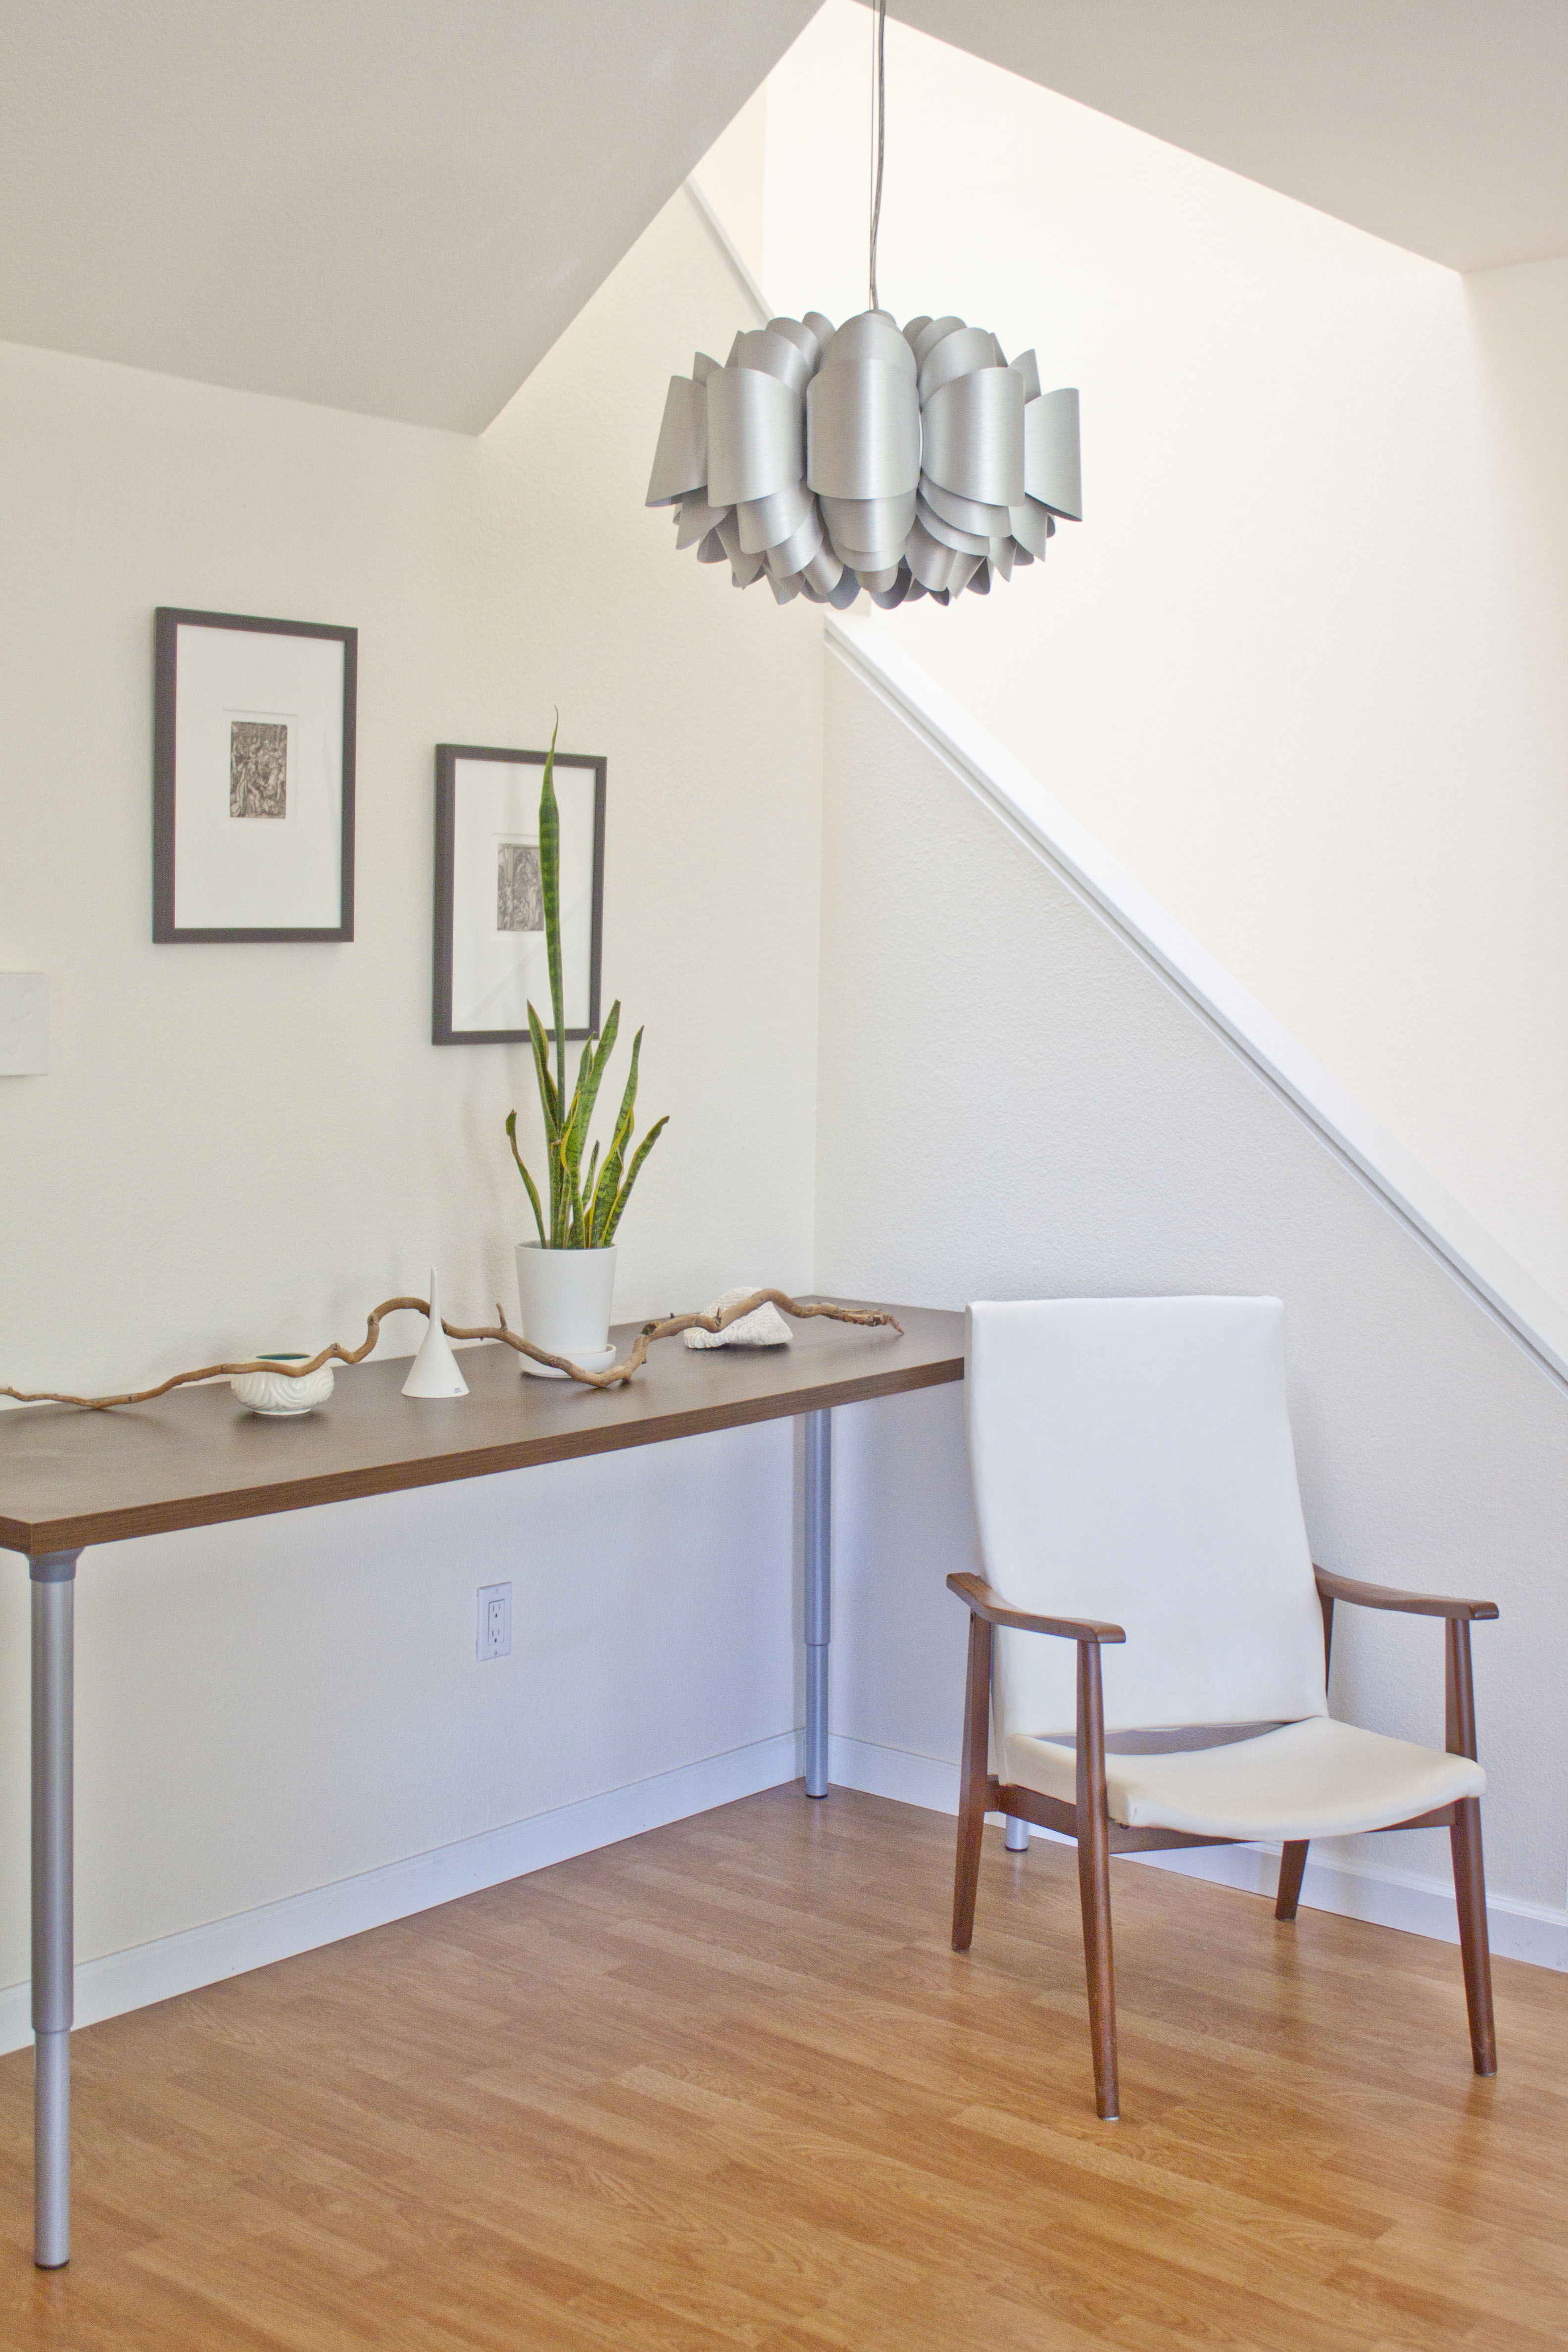
Above my front door, a set of antique keys hang in the window on clear fishing wires. An antique brass hand clip is attached to my front door, I use it all the time to clip cards and notes for the delivery man or just to write a fun note to people I’m expecting! Electronic keyless doorlock (quite ironic don’t you think…since I have a bunch of keys hanging above, my actual lock does not require a key! Electronic Lock from Amazon. Electronic door locks are great, I can go jogging without any keys, and if someone is coming over, I can give them a one time guest code. My entryway table is from IKEA, I used the adjustable legs and the table top I found in the salvage section of IKEA for only $5! Always visit the salvage section of IKEA first, there’s a very good chance that you’ll find exactly what you need in the salvage section for 75% off. 1950’s Danish modern chair from Ebay. 17th Century Albrecht Durer Prints in custom frames. Possini Lamp from Lamps Plus.
Living Space and Kitchen

Living Space
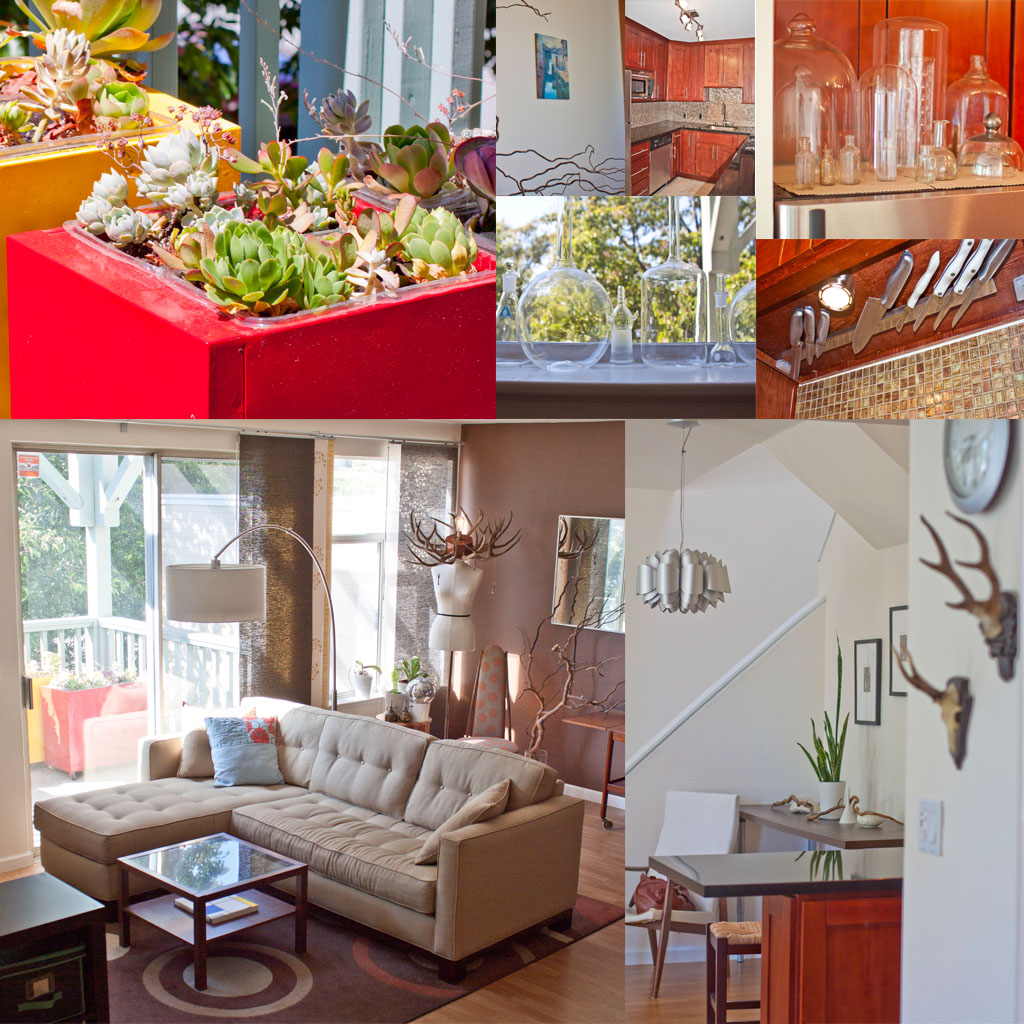
My living room and kitchen are in the same room. This sofa pictured, I regret buying. The tufted buttons on the seat popped off within 1 year of use. And the cushion became wrinkled and saggy. Although the store I got it from replaced the buttons for free they would not do anything for the saggy cushions. As much as I like a deal, when it comes to a sofa, this is the place to splurge. I have since replaced this sofa with the Crate and Barrel beautiful Petrie in Leather (Yes, it’s $4000, but it is made in the US with leather from England). C&B will give you a 10% off if you tell them you just moved (even if you did not just move, just say you did, and they will give you 10% off. Another way to purchase large ticket furniture at a discount is to scoop up store credit or store gift cards at a discount, you can easily do a search for “gift card exchange” and many sites offer gift cards to major retails for 10-30% off. Combine all these things together you can usually get 10-20% off retail even without a sale. I also collect vintage and new glass bell jars and vases, they display well in windows. The planter boxes are featured in my File Cabinet Planters blog entry. The kitchen features granite counter tops and wood cabinetry (I did the remodel myself, perhaps topic for another blog entry in the future). One feature I like is the magnetic knife strip (IKEA) I attached above the sink. It is hidden from view and a great place to hide knives. When it comes to kitchen counter tops, there should be nothing on the counter top. Everything should have it’s own space in the kitchen, stored away. Try removing everything from your kitchen counter top (yes, try putting even your toaster and your mixer in a cabinet) you’ll immediately be inspired to cook healthier and your kitchen will suddenly develop a “gourmet” appeal. Try it, you’ll see. It’s magic.
Living Space

Sapien book case (mine is a fake one from West Elm, the real Sapien book case is from Design Within Reach) adds a dash of color to my living room from my collection of books. I would recommend getting the real one from DWR, yes it’s pricier, but it is a lot more sturdy than the West Elm one. Self made ceramic pots sit under a 1950’s rolling bar cart from vintage market. Ikea mirror hung horizontally makes the space feel bigger.
Living Space Décor

Living space decor
This is my living room “focal point” I made this Diane Arbus inspired antler lamp from a dress form mannequin (thrift shop find), and old antler ring that was meant to be hung over a pool table (flea market) and using an Edison bulb, these bulbs are very popular now and you can find them on Amazon or Ebay now for about $10, although for the best price, you can go to Cliff’s Variety Store in the Castro, San Francisco, they carry them for $3.50. I wired it up myself using an old lamp base that someone threw away. I love how the antlers form a crown at the head of the mannequin body, and when you turn the light on, it casts the most eerily wonderful shadows on my ceiling and walls.
The chair was also a craigslist find, it is a walnut chair from the 50’s that had a torn seat bottom (it was original upholstered in black vinyl) I replaced the seat with my own fabric from Designtex (you have to be a “designer” to purchase fabric from them, but you can just pretend to be a “designer” by calling them up and saying you are one, it’s meant to be fabrics for commercial purposes but they offer modern designs that the local Joanne’s does not carry, they are pricey though, per yard runs about $40-$200 depending on the fabric).
Bedroom

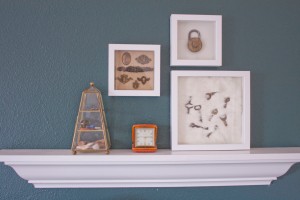
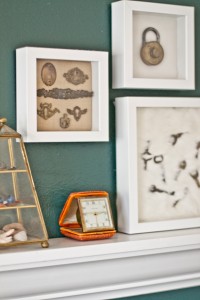
Bedroom Details
My bedroom was fairly small, so I wanted to maximize the amount of space by using a bed that did not have a headboard. I created a visual equivalent of a head board by using masking tape on an accent wall color. I measured carefully and centered the masking tape around where I wanted to place my bed, and painted over the masking tape. After the paint dried, I peeled off the masking tape leaving me a white outline (the original wall color). Add a decorative mirror (IKEA, this was just a frame, and I purchased some “mirror finish spray” from craft store to turn the glass into a mirror finish), and voila: Headboard! Other details include a decorative picture ledge I found on the street on trash day (people throw away all kinds of useful things!). I have collected key paraphernalia for a long time, so I loved the idea of putting keys, locks and lock plates in shadow boxes. Vintage orange alarm clock from the 60’s. If you frequent flea markets, you’ll come across these little travel alarms in various colors and shapes, they are so fun to look at and collect (I only have one but I seriously think about adding more to my collection all the time. There is a great selection on Etsy, but most are overpriced (I consider it a good deal if it’s less than $8, so I only buy them at flea markets when the price is right!). Finally, yes that’s me, taking a picture of myself through my giant wall mirror. A great place to find large mirrors for free is craigslist. This happens to be a closet door mirror, the hinges got broken so the owner wanted to get rid of the door. While they have outlived their usefulness as closet doors, they sit nicely tilted against my bedroom wall as a fantastic dressing mirror. Best of all, it’s free!
I hope this entry has given you some ideas and inspiration for your own home. Although a small space, it’s a place I can call my own.
Here are some additional detailed shots from my apartment: